Downloading and Installing IDA 7 Free
IDA Free version 7 is available right now (If not please let me know) from here: Download IDA Free 7.0; you must use this version because the most current
free version (8.2) will only load 32- or 64-bit Windows PE code! But all Legacy BIOS code must start executing in 16-bit REAL mode, so
the latest free version of IDA is impossible to use for that purpose. (This is the company website: hex-rays.com, and verified hashes are:
SHA-256: 64C4073CA57DC612963413C337FD7F802BF812E01E655D0F4F33827342F7A772
SHA-1: 38B41BAF3DD60DBA67A7E656C5E5BEB2D4A0ADCA
MD-5: C610E2F6F1E8EE52643B69852A922703.)
Installing IDA 7 Free
Upon executing the install program, you might see the Windows UAC warning; just click on "Yes" (the install doesn't have an official;
i.e., kickback agreement with Microsoft).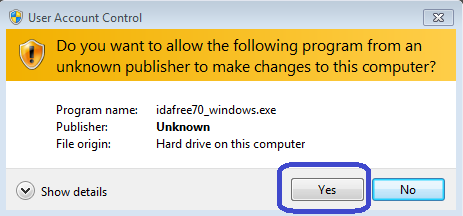
You'll be greeted with the following:
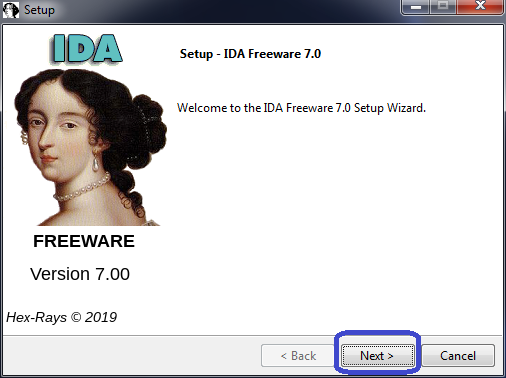
And then everything is pretty much a standard Windows install process:
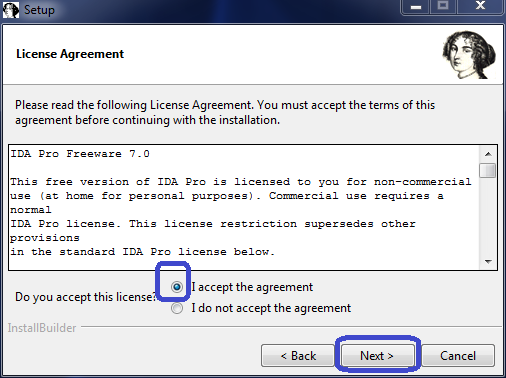
Fill in the "I accept the agreement" button, click "Next," and you'll see:
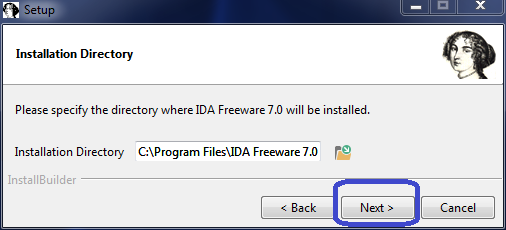
Use the default directory, then:
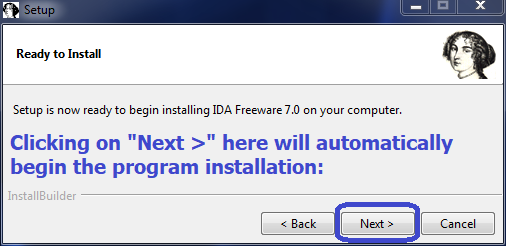
And rather quickly, the install will finish:
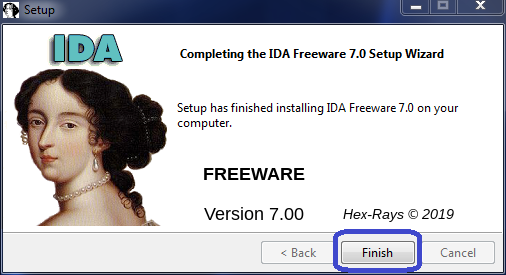
Following the installation, you'll see this icon on your Desktop,
but do not run the program yet:

The IDA 7 Configuration Files
Prior to running the program, there's a change you'll need to make in IDA's ida.cfg text file; which is
found in this folder:
C:\Program Files\IDA Freeware 7.0\cfg\ (unless you changed the default install location).
But to change this
file, you might need to open your text editor (such as Notepad) with Administrator privileges, since it's under the "Program Files" directory.
However, there's another way: First make a copy of the ida.cfg file to any user folder, edit the file there, and then copy the edited file back into IDA's
cfg folder; the OS will simply ask if you wish to proceed.
What you need to do in the file: Comment-out line 68 (which
begins with: "rom" : "z80") by adding two forward slashes (//) at the beginning of that line.
If you don't do this, trying to open a ROM file will cause IDA to respond with:
Your first ROM File Under IDA 7
First, download this Serial 3V ROM file which is based upon my Serial3.rom, but with enough added code which makes it possible to use this ROM under a VMware instance! It definitely will not boot an OS, but if you set up a Serial Port output text file, it will print two lines to it before locking-up the VM. And here's another file you'll need in order to properly examine any 512kb ROM files: An IDA .idc Script file (right-click on the link and choose "Save Link As...").
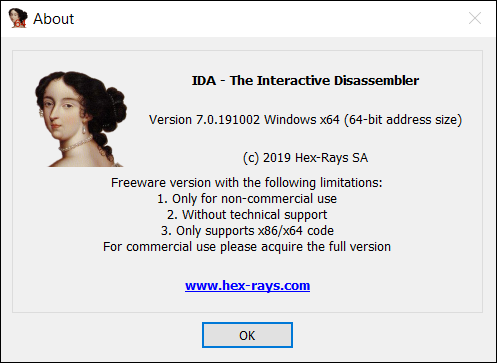
First Steps: Open IDA 7 Freeware, and for a short time (about 3 seconds only) you'll see the IDA 7 Freeware
"About" window (which you can view later from the program's "Help" —> "About the program..." menu):
Followed by this window: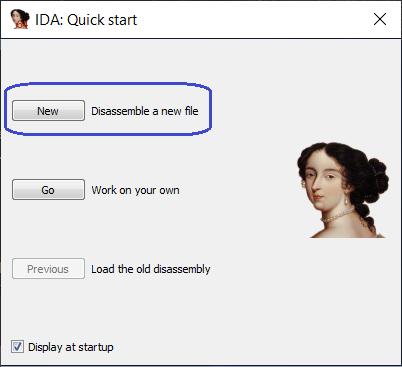
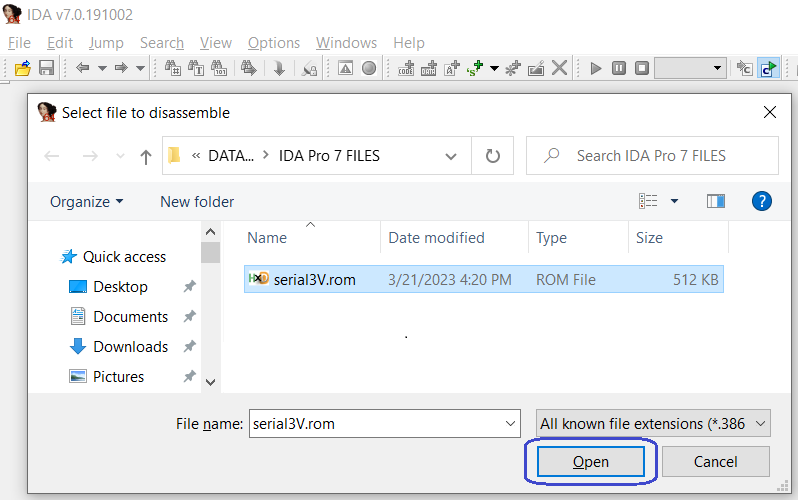
Click on the "New" button, then navigate to wherever you extracted and saved my serial3V.rom file and open it:
But before IDA will open the file, it requires you to confirm (or change) some things. For our example, simply use the default settings and click on
"OK" :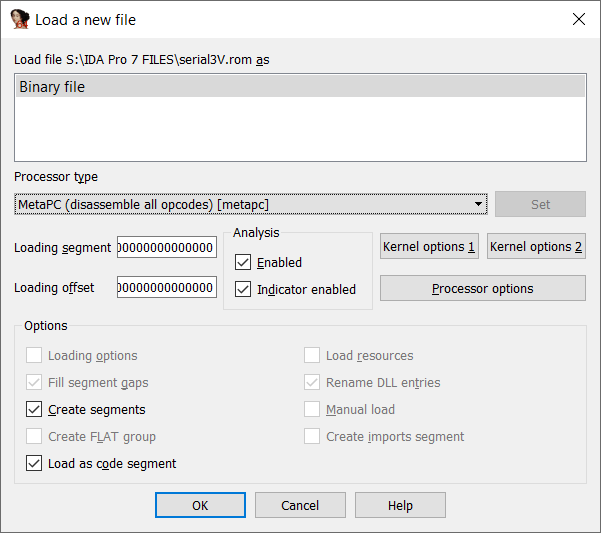
Since none of the machine code in the file is for a processor beyond the Intel i386, that choice would work equally as well.
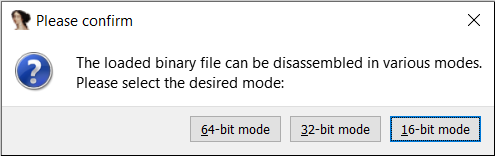
Now IDA needs to
know whether the binary file should be disassembled (or at least will begin) in 64-, 32- or 16-bit mode. Click on the "16-bit mode" :
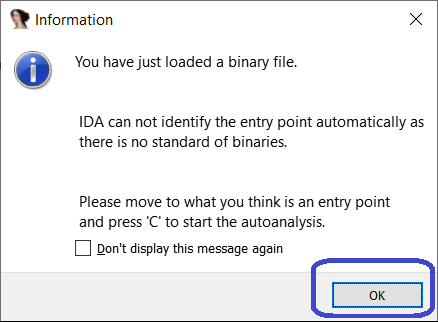
And, lastly, IDA reminds us that we need to show it where the code begins (I will show you how below!):
You should now see the following in the default IDA View-A Tab:

Note that IDA automatically provides you with the SHA256 and MD5 hashes of the file! (If you don't see
"SHA256: 79A2C6 ... etc.," then you did not open my file.
After the file opens inside IDA, you'll need to apply the .idc file you downloaded (we suggest doing this immediately after
the file opens) by using the "File" menu and then selecting "Script file..." (or pressing the ALT+F7 keys) and
choosing that .idc file: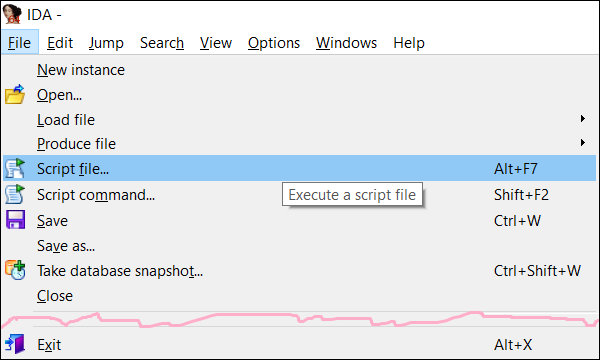
Select that .idc file and "Open" it (and
IDA will automatically execute its instructions):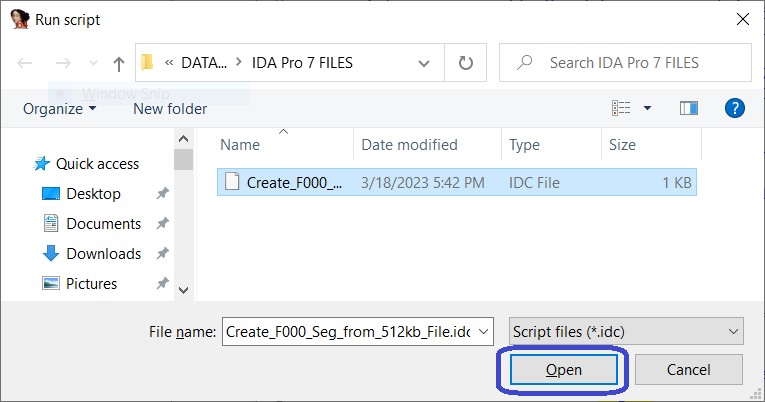
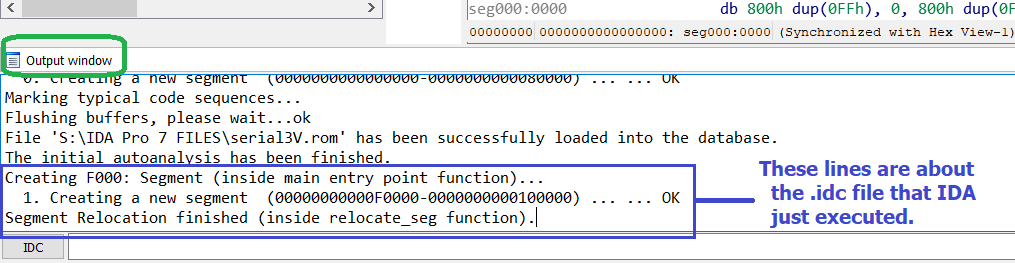
That script file creates an F000: Segment with a copy of the file's last 64 KiB bytes in that separate segment; which the script has also named as:
"F000" (we could have named this anything, such as "_F000" or even "_ourF000seg"). Internally, IDA 7 knows that we copied
the file bytes to a 64 KiB Segment starting at linear Memory location 0xF0000.
These next photos show how
you can place your mouse cursor over the lines just below the IDA View-A window until it changes into the shape you see inside the RED square, then click and
hold the button down and drag the lines upward to make the window larger. After you've finished reading any messages, you can shrink it back
down to only one line: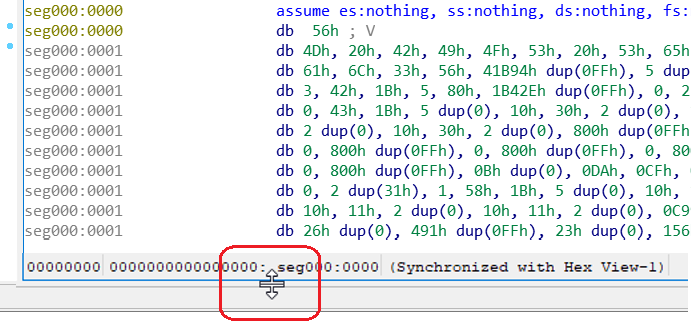
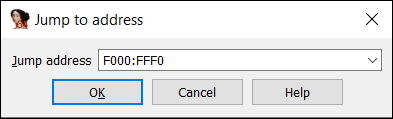
Now press the "g" key, and a dialog box will open for you to enter a location. You can enter "F000:FFF0" (or
0xF000:0xFFF0 and possibly the linear address: "0xFFFF0" — but not always) and IDA will take you there.
Then, making sure the cursor has remained on that line, press the "c" key (it doesn't matter if it's lower or upper case)
to begin disassembling the code.
CAUTION: Be sure about what you decide to turn into code! IDA 7 does not have any undo function; it's messy and takes time to
turn anything that ends up being nonsense code back into data!
[This is one of the reasons I still try to disassemble some code inside a DEBUG window when
I simply want to see if part of a program might be code, or simply makes no sense at all. Another reason is that I can assemble code anywhere in a Segment
without it ever complaining like MASM or NASM or any other 'Assembler' I know of will do, when you simply want to get a bunch of assembled hex bytes to drop into some
code somewhere; without the hassle of writing a full-blown .ASM file that will assemble (without any errors preventing it from doing so!) for a particular assembler.]
You should now see the following: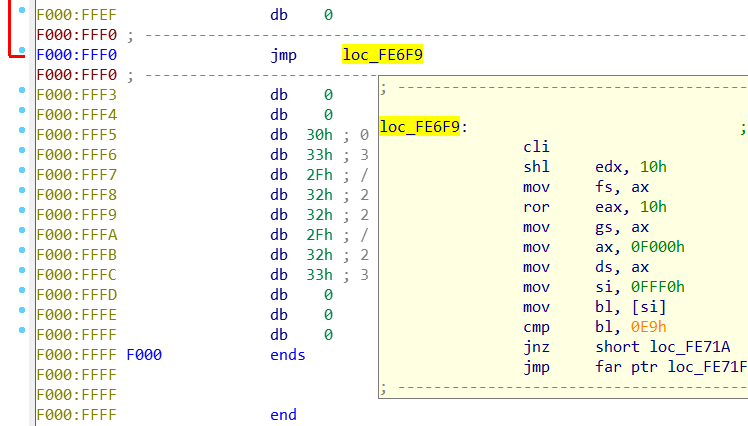
And double clicking on any loc_<some address> label while your cursor is over it (and often YELLOW highlighted) will jump to that location! Go ahead and jump
to loc_FE6F9. You should now see: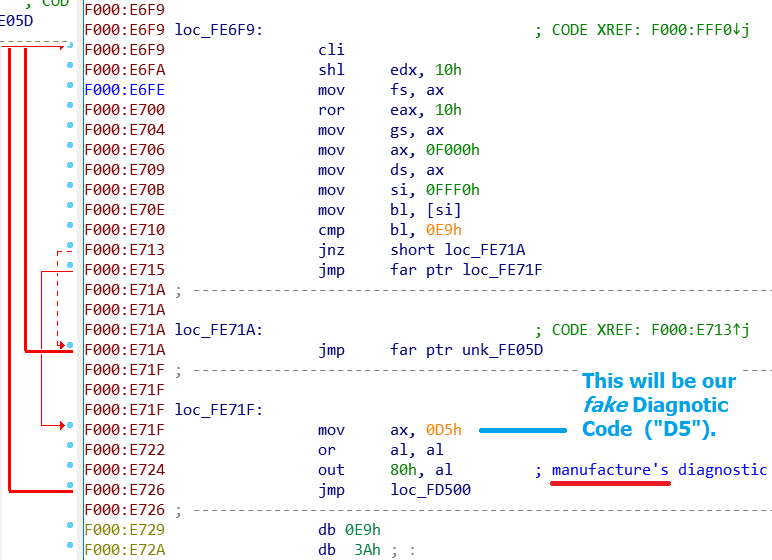
If you can't stand that spelling error, with the cursor
anywhere on the line of address location F000:E724, press both the Shift and ; keys at the same time.
This will allow you to create or edit any comments. I changed mine to "Manufacturer's Diagnostic Checkpoint (POST Code)". Now place the cursor at Memory
location F000:D57B (there are 4 lines with that label, it doesn't matter which line you place the cursor at) and press the Insert
key. IDA will pop up a box asking you to "Enter additional anterior lines" (these would be in addition to the grayed-out ; ---- etc.
line that IDA has already placed there! I decided to add an empty line (or two) and then what you see here (note: you must include the ";" character in
your additions for any Insert comments):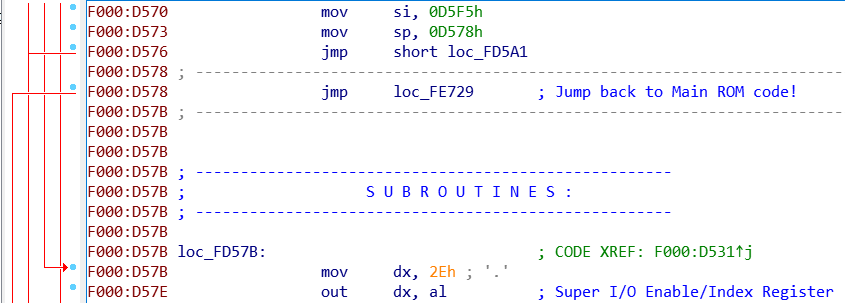
Now go to (or jump using
the g key to) address: F000:D5C9 and press the a (or A) key which will turn all those bytes into two lines of a much easier to read text
string! Do the same thing at F000:D5F5. You can save any changes you've made at any time to IDA's database file for this ROM file by clicking on the
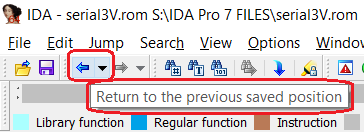
"floppy diskette" icon near the top-left corner of the window. You can also go back to your last location using the small LEFT BLUE ARROW icon (or use the DOWN
ARROW to select from a list of locations)!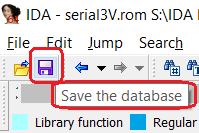
Because the code in this ROM file makes use of the SP (Stack Pointer) register as the return address from a number of jumps to subroutines (following the standard
practice that no BIOS code should ever use any Memory that it has not tested first; and the fact that it may not even be located in RAM but rather an unchangeable ROM chip),
IDA 7 Freeware has no clue that many of the bytes in this file are actually code. So, if you look for all the mov sp, <some address>
instructions, it's highly likely you can convert the bytes at those locations (such as D533 as seen below) into code:
F000:D52E mov sp, 0D533h
F000:D531 jmp short loc_FD57B
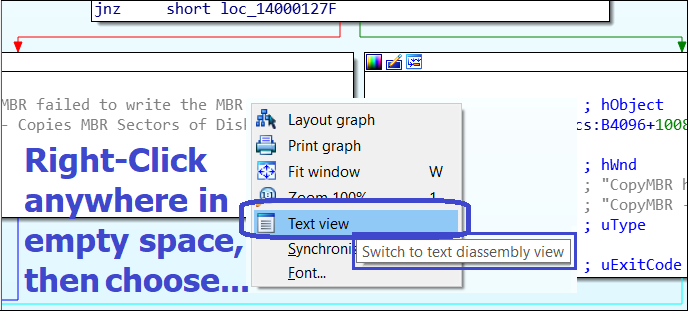
If IDA ever goes into its "Graph View" mode (similar to what you see below), to
get back to the original view, simply Right-Click on any empty space and choose: "Text view"
Another important feature of IDA is horizontal "color coded" bar running from one
end of the window to the other (most often with a BLACK area at the end). Note the little YELLOW Down Arrow which I've circled in RED below! By putting your mouse
cursor on that Down Arrow and grabbing it, you can move it to the left or right inside the bar. And Left Clicking the mouse cursor anywhere inside
that bar will not only cause the little YELLOW Down Arrow to move to that position, but also cause the IDA Display to move to the CODE which that part of the bar is
associated with! This provides you with a very quick way to skim through all the code in your file:

Before finishing this session, there's a setting in the "Options —>
"General..." window: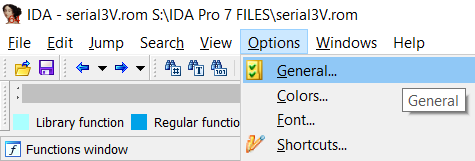
which will allow you to see the machine code bytes that each
of the disassembled instructions are comprised of: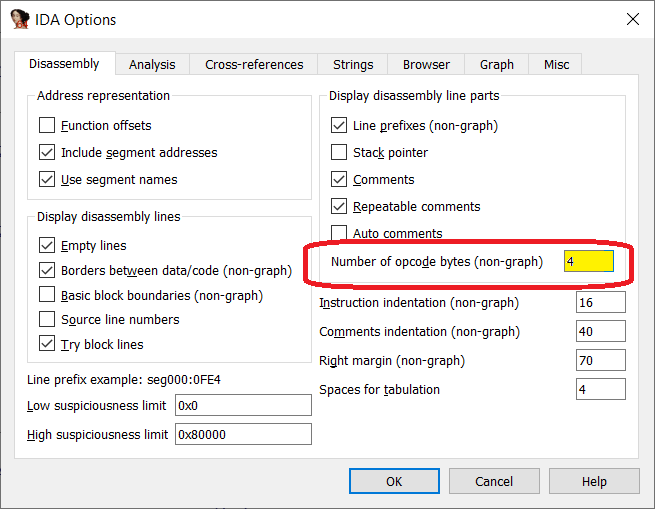
The default setting in the RED circle is 0,
but setting this to 4 is all you need for this file; and if any instruction (or string) uses more than what you set it to, the display will show a plus (+)
symbol immediately after the last visible machine code byte.
You can either exit the program now, or try locating the rest of the code and/or add more comments. Note: If you exit the program, the following window
appear, defaulting to saving the database file (using what's shown in GREEN) of everything you did; which will be available as you left it the next time you start the IDA 7
Freeware program and select a "Previous" .i64 database file. Should you wish to start all over again at any time, you can select the box in RED to
permanently delete the database file: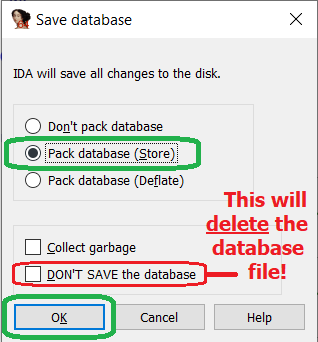
An IBM 5150 PC's ROM File in IDA 7
First you need to locate a valid image file of the April 24, 1981 IBM PC ROM. It's available from many websites, but it should always be
available from the PCE website:
Download the IBM-PC-1981-04-24.rom file from here (on Hampa Hug's Download Page).
Run IDA 7 Freeware, click on "New," open the ROM file from wherever you're storing ROM files for IDA 7, then in the pop-up "Load a new file"
configuration window, make these changes: Choose "Intel 8086 [8086]" from the drop down items under the "Processor type" box (use the
small DOWN ARROW there). Then press the "Set" button! Next, enter "0xF000" in the "Loading segment" box, and "0xE000"
in the "Loading offset" box. Leave all other defaults as they are, and press the "OK" button as shown here:
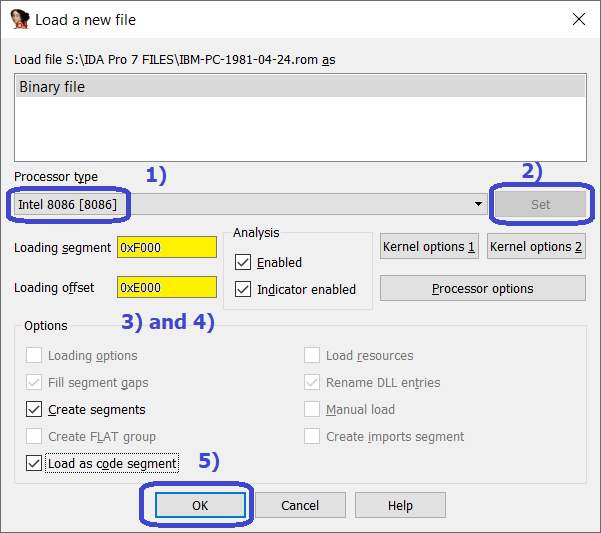
As before, be sure to press the "16-bit mode" button in the next pop-up window as you did
for the first example file!
After IDA 7 opens the file, check the hashes. If you search the Internet for the MD5 hash ("6338A9808445DE12109A2389B71EE2EB"),
you'll find at least one other website with this ROM file. Now follow the photo below, or press the ALT+S keys.
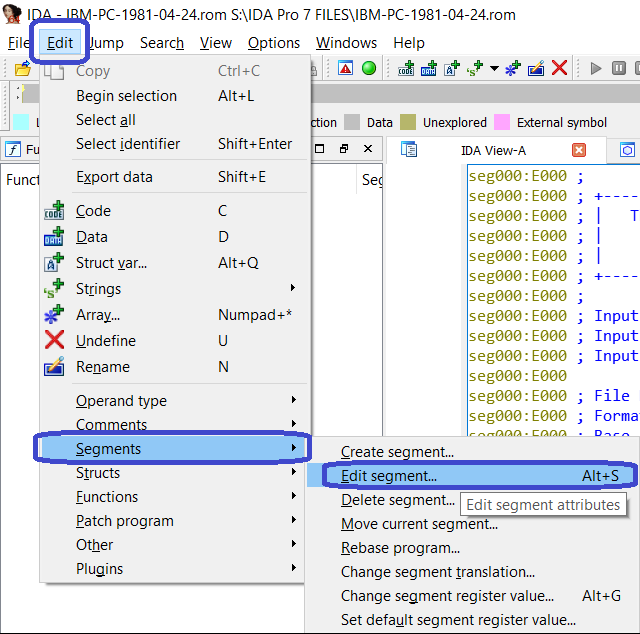
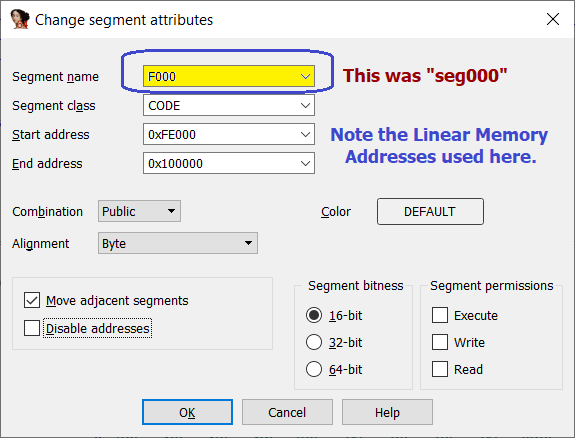
The only change to be made here is in the "Segment name" box. As I wrote above, we could use
almost any name here, but I believe using "F000" (or "_F000" as some do) helps the user remember where the code is supposed to be located in Memory. Note
from the "Start address" and "End address" boxes, that IDA is obviously keeping track of where the code is located using a Linear Addressing
scheme (and some simple hexadecimal math shows our file is: 0x100000 - 0xFE000 = 0x2000 = 8,192 bytes = 8 KiB in length). Press "OK" to change the Segment name!
Now let's expand the compact (but very cryptic) way IDA is currently displaying the file's bytes:
Using your mouse cursor and button (or keyboard SHIFT and Arrow keys), begin highlighting all the lines as shown below:
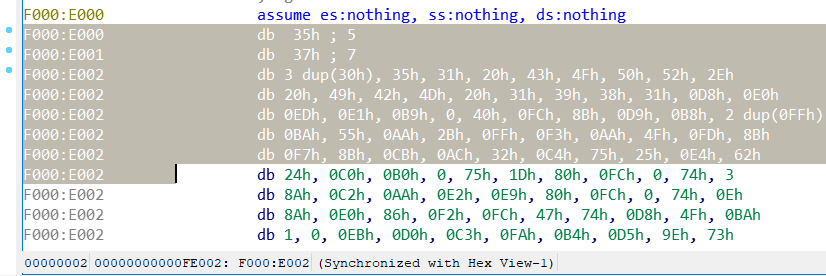
You can stop anywhere after a few lines are highlighted, but be careful to not remove the highlighting!
Now press and hold down both the Shift and CTRL keys at the same time, and then also press the Page Down key
before releasing any of them! Doing this should highlight all the remaining lines down to the very end of the file; like this: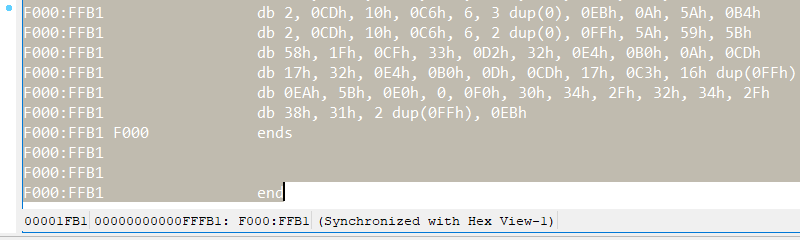
Make sure you do not UN-highlight any of the bytes (if you do, start over!) before taking the next step: Now, simply press the u (or
U) key. This will pop-up the following: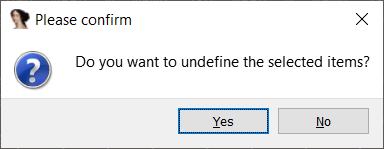
Clicking on Yes will undefine all of the
bytes, and give you a display like this: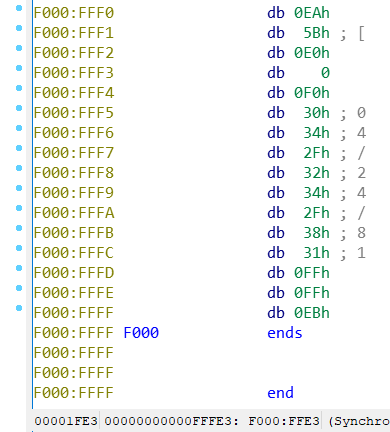
While thinking about those key combinations, it should be pointed
out that unlike many applications where Control+Home and Control+End go to the Start and End of a file, under IDA, you must press the CTRL and PageUp or the CTRL and PageDown keys in order to jump to the Beginning or the End of the
IDA disassembly display!
Now with the cursor on line "F000:FFF5" press the a key, and then at line "F000:FFF0"
press the c key to begin the disassembly: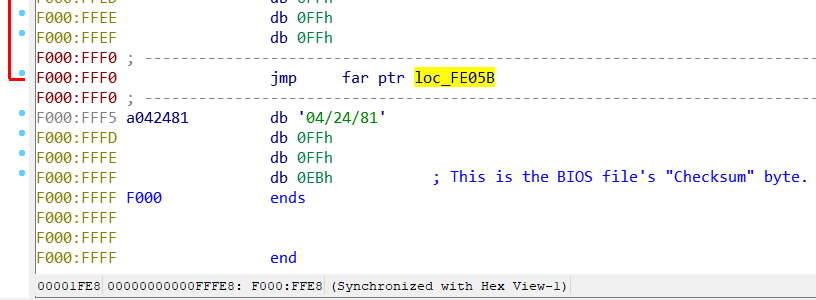
My main reason for choosing this BIOS file was its small
size (only 8 KiB) to show this manual method of loading all the initial segment parameters is much more convenient for 8, 16, 32 or 64 KiB BIOS file sizes (versus trying to create
a script file that makes a copy of a large BIOS file's last 64 KiB into the 0xF000 Intel Segmented Memory scheme; just below the first 1 Megabyte of Memory! The
Offset values for 16 KiB, 32 KiB and 64 KiB files would be: 0xC000, 0x8000 and 0x0000, respectively.
There's really not much point in
continuing to disassemble the file all on your own, because every byte of the source code for this BIOS file can be found in the IBM 5150 PC Technical Reference
Manual as I discussed here on my BIOS page. Those pages would tell you what is actual code and what are DATA bytes hidden in
between the code. Save, delete or continue with this file as you wish.
In the Future — I'll be adding some links that explain how to use the many features of IDA 7 Freeware!
If you have a specific question, or would like a copy of my database for this file, I'd be happy to reply to an email from you!